Saturday, October 15, 2011

Apple-Blueberry Sonker


You may ask what a sonker is.  Imagine a dessert with a spicy apple-blueberry pie filling topped with a sweet cookie like crust. Well a sonker is like a fruit cobbler with a thick cookie like crust. I was introduced to this delicious regional dish when I went to a sonker festival just outside of Mt. Airy NC (aka Mayberry) where Andy Griffith grew up. You can make it with any fruit filling or even sweet potatoes (think of candied sweet potatoes). I usually serve it with a scoop of vanilla ice cream. It tastes especially good if accompanied by a bluegrass band, sitting in folding chairs, in front of a 200 year old house (you had to be there).

When I went to the sonker festival I was not expecting to be inspired. I didn’t even know what a sonker was until I got there. You need to constantly try new dishes wherever you may be to find the inspiration for new dishes. The topping for the sonker came from a local recipe but the filling was my own creation.


Filling

2 Lg Granny Smith Apples (about 1 ½ lbs) *
1 C Blueberries (fresh or frozen) *
¼ tsp Table Salt
½ tsp Fresh Ground Nutmeg
1 TBS lemon juice
1 tsp ground Cinnamon
¾ C Sugar

Crust
1 C All-Purpose Flour
1 C Sugar
1 Lg Egg
1 stick Salted Butter

8”x8” Baking Dish

Preheat oven to 400°F.

Peel and core the apples. Slice the apples thinly (1/4 inch) and place them in a large bowl with the remaining filling ingredients. Pour the mixture into the 8”x8” baking dish.

Melt the butter in the microwave for 45 seconds on high.

In a separate bowl mix the flour and sugar together. Beat the egg in a small bowl and add it to the flour sugar mixture. With a fork, mix the ingredients together until it forms large crumb like pieces. All of the flour/sugar will not mix completely. Spread the mixture evenly over the fruit filling. Drizzle the melted butter over the flour mixture. It’s ok if every little space is not covered with the butter.

Bake, uncovered, at 400°F for 40 minutes or until golden brown. You’ll smell it if it’s done.

Serve warm topped with ice cream.

* Pronto Substitutes

Apples – Substitute peaches.

Blueberries –Substitute blackberries or raspberries.

To print a copy of this recipe go to Apple-Blueberry Sonker.

Restaurant Review: Biaggi's, Cary NC


$$-$$$ ★★★★☆


Location: 1060 Darrington Drive, Cary, NC 27513


It is very unusual for me to go to an Italian restaurant; I’m usually disappointed and think to myself that I can make it better at home. Biaggi’s is a jeweled exception with great Italian food that is fresh, delicious, with a creative flair.  


We started with a roasted beet, arugula and goat cheese salad that was simple yet complex with a fresh taste that set up the palate for the rest of the meal.


The appetizer brought me back 30 years to when I first got married. My wife and I would travel to Bethlehem Pennsylvania to visit her sister and we would inevitably order Stromboli. I have been searching for an equivalent ever since and I finally found it at Biaggi’s. Think of a rolled up pizza with a thin crispy crust, melted mozzarella and pepperoni baked to perfection, I can’t wait to order this as my main course so that I can eat the entire Stromboli.


For dinner I had a shrimp and crab cannelloni. Think of a thin spinach pasta shell wrapped around shrimp, crab, and ricotta, then covered with a rich lobster-tomato cream sauce. It was light, rich, and delicious.


There is one dish that is served at almost every Italian restaurant, veal parmigiana. It’s one of the dishes that I use to compare restaurants and to compare against how I would make it at home. Biaggi’s veal parmigiana is as good as my mothers and the best I can remember since living in New York.


My friends often ask me what my favorite Italian restaurant is and I finally have an answer – Biaggi’s.

Cuisine: Italian
Atmosphere: Casual
Service: Eager to please
Recommended: Veal Parmesan, Shrimp & Crab Cannelloni, Stromboli
Open: lunch and dinner daily
Reservations: accepted
Other: Visa, MasterCard, American Express, Discover; everything is à la carte; alcohol; smoke free; gluten-free menu available; half portions of pasta available

Review: Jerusalem Garden Cafe Asheville


Restaurant Review: Jerusalem Garden Cafe $$$ ★★★★☆


Location: 78 Patton Ave, Asheville, NC 28801-3315

I recently visited Asheville and I found a wonderful restaurant that had good food and great atmosphere. The Jerusalem Garden Cafe was founded by Frank Badr in 1999 on the goal of bringing the taste of Istanbul Turkey, Cairo, Lebanon, Morocco, and The Holy Land to your table. Jerusalem Garden Cafe offers Choice Cut Filet, Prime Cut Steaks, Fresh Seafood, Vegan and Veggie dishes!


Eating at the Jerusalem Garden Café was like dining in Morocco. The walls were draped with colorful cloths giving you the impression that you were eating in a tent. You can eat at a table or sit on the floor if you are adventurous. On Saturday nights they even feature a belly dancer. The atmosphere is romantic and exotic for that special night out.


The food was excellent. The Lamb Shawarma was perfectly spiced with thinly-sliced marinated leg of lamb grilled with sliced onions on a bed of rice and spinach. The special was Tagine Kefta, Moroccan meatballs smothered in a wonderful tomato based sauce over a base of rice and zucchini. The hummus was smooth and fragrant with the taste of tahini.
   
Atmosphere: colorfully exotic
Service: excellent
Recommended: Tagine Kefta
Open: lunch and dinner daily
Reservations: accepted and recommended on weekends
Other: Visa, MasterCard, American Express, Discover; no alcohol; smokefree; accommodates children; solid vegetarian selection;

I dine anonymously and pay for all meals. I rank restaurants in five categories: ***** Extraordinary **** Excellent. *** Above average. ** Average. * Fair.
The dollar signs defined: $ Entrees average less than $10. $$ Entrees $11 to $16. $$$ Entrees $17 to $25. $$$$ Entrees more than $25.

Sunday, October 2, 2011

Three Bean Salad


I’ve always enjoyed three bean salads and I was determined to create one with Italian ingredients and great flavor that even my wife, who isn't fond of three bean salad, would enjoy. The creaminess of the cannellini beans contrasts with the sweetness of the roasted bell peppers and the acidity of the balsamic vinegar to give a distinctly Italian flavor to this salad. The other great feature of this salad is that it’s so easy to make and it will last up to a week in the refrigerator. I’ll sometimes add tuna fish to it and take it as a lunch.

Ingredients
1 15oz can Chick Peas
1 15oz can Cannellini (Garbanzo) Beans
1 15oz can Black Eye Peas
½ C Roasted Red Peppers
1 TBS Capers (optional)
1 TBS Fresh Parsley (chopped) *
1 TBS Fresh Basil (chopped) *
2 TBS Extra Virgin Olive Oil
2 TBS Balsamic Vinegar *
1 TBS Lemon Juice

Makes 12 servings

Drain and wash off the chick peas, cannellini beans and black eye peas.

Dice the roasted red peppers into ½ inch squares.

Chop the parsley and basil.

In a large bowl, whisk together the olive oil, vinegar, and the lemon juice. Add all remaining ingredients and toss.

This salad is even better if made the day before and allowed to marinate overnight.

* PRONTO SUBSTITUTES

Parsley and Basil – Substitute 1 teaspoon of dried parsley or basil for the fresh parsley or basil, lets salad marinate at least 1 hour before serving to rehydrate the dried herbs.

Balsamic Vinegar – Substitute red wine vinegar.

To print this recipe, go to Three Bean Salad.

Sunday, September 25, 2011

Panzanella Tomato Salad


Panzanella tomato salad is a unique twist on tomato salad.  Many Italian dishes have their origins in the countryside.  The peasants learned to use everything they grew and did not throw anything out.  Nearly 50% of the produce grown in the US is discarded because of spoilage.  Italians found many uses for their day old bread.  It was often ground and fried in olive oil to be used as a substitute for cheese.  In the case of this tomato salad, the day old bread was soaked in water and added to the salad where it absorbed the flavors of the dressing. The tomatoes and freselle dance on your tongue with the taste of the fresh herbs and balsamic vinegar.

Makes 6-8 Servings

Fresh Herb Dressing *
2 TBS Fresh Basil (chopped)
2 TBS Fresh Parsley (chopped)
1 tsp Fresh Thyme (chopped)
Juice of 1 Lemon
½ C Olive Oil
1/8 C White Balsamic Vinegar *
½ tsp Kosher salt or ¼ tsp table salt
5 grinds of Black Pepper

Other Ingredients
3 Lg Ripe Tomatoes
2 C Water
4 Friselle Caserecce *
1 Small Red Onion

Coarsely chop the fresh basil, parsley, and thyme. Place all ingredients into a blender or food processor and pulse 10 times.  You want to have visible pieces of fresh herbs in the dressing.

Cut the red onion in half and then slice ¼ inch thick.

Place 2 C of room temperature water in a bowl and soak each friselle in the water for 15-30 seconds or until it breaks apart easily.  Break it up into small pieces and place in a separate bowl.  Continue until all 4 pieces are soaked and broken up. Do not over soak. The friselle should still be dry in the center.

Note: If you are substituting the toasted Ciabatta bread, do not soak them in water.

Wash and cut each tomato into 8-12 wedges.

Mix the dressing, the cut tomatoes and the bread together in a serving bowl and refrigerate for at least 1-2 hours tossing every 20-30 minutes.  This salad is just as good the next day.

* Pronto Substitute

Dressing – You can substitute ¾ C of your favorite Italian dressing and optionally add the fresh herbs.

White Balsamic Vinegar – Use red wine vinegar.

Freselle – You can find this unique bread product in Italian specialty stores.  It looks like a squashed toasted bagel.  You can substitute 6 cups of Ciabatta bread that is cut into large cubes, tossed with 2 tablespoons of olive oil and ¼ teaspoon table salt, arranged in a single later on a baking sheet, and toasted in the oven at 400° until light gold in color (about 15-20 minutes tossed halfway through). Cool to room temperature before using. Do not soak in water, just toss with the dressing.

To print this recipe, go to Panzanella Tomato Salad

Saturday, September 17, 2011

Fajitas Italiano


This fajita variation with Italian salsa and Italian marinade fuse with the classic Tex Mex dish that has become a regular part of many American diets. I’ve cut down the grilling time by slicing the flank steak before grilling and I’ve marinated the steak in an Italian marinade that my mother taught me. Combine these preparation techniques with the Italian Salsa and you have a unique fusion of Tex Mex and Italian food. Marinating the steak is a wonderful way to infuse flavor into the meat and tenderize it at the same time. You can use the marinade in this recipe with london broil, strip steak or any other steak you want.

Makes 4 servings of 2 fajitas each.

Salsa Ingredients *
1 dry pint Grape or Cherry Tomatoes
½ C Flat Leaf Italian Parsley, chopped
3-4 fresh leaves Basil, chopped or ¼ tsp Dry Basil
2 cloves Garlic Confit, minced (or 1 clove raw garlic)
1.5 TBS Extra Virgin Olive Oil
1 TBS Aged Balsamic Vinegar
¼ tsp Dry Oregano
¼ tsp Table Salt
5 grinds Black Pepper
2 tsp Brown Sugar
1 Jalapeno Pepper, seeded and chopped (optional)

Marinade Ingredients *
½ C Balsamic or Red Wine Vinegar
½ C Dry Red Wine
2 TBS Olive Oil
2 Cloves Garlic, chopped
1 tsp dried Oregano or 1 TBS fresh Oregano chopped
Salt and Pepper, to taste

Ingredients
2 lb Flank Steak
2 lg Red Bell Peppers
2 TBS Olive Oil
½ tsp Kosher Salt
2 Medium Yellow Onions
Canola Oil for grill
8 Tortillas
1 C Shredded Fontina Cheese
1 C Sour Cream

* Pronto Substitutes
Sliced Flank Steak – You can marinate the flank steak whole and slice it after grilling.
Italian Salsa – You can substitute your favorite salsa.

To prepare the salsa, cut the tomatoes into a small dice. Add chopped parsley through jalapeno pepper. Marinate 1-24 hours before serving.

Place the marinade ingredients into a container and shake it until mixed.  Pour the mixture into a Ziploc bag.  Slice the flank steak into ½ thick strips against the grain. Add the meat to the marinade and let it marinate at least 1-2 hours in the refrigerator. NOTE: You can marinate the meat up to 24 hours in advance if kept covered in the refrigerator.

Clean and remove the seeds from the red bell peppers. Cut into 1 inch slices. Heat 2 TBS of olive oil in a large skillet and add the sliced bell peppers. While the peppers are cooking, peel the onions, cut them in half, and create ½ inch slices. Add the sliced onions and the ½ tsp of kosher salt to the pan with the cooking peppers. Continue to cook until the onions are translucent and the peppers are tender.

Heat your grill to medium high heat. Oil the grill with canola oil to prevent the steak from sticking. Grill the marinated flank steak strips just until they have grill marks. Do not overcook or the steak will be dry and tough.
Heat the tortillas according to the package directions.
Top each tortilla with 2-3 pieces of grilled steak, peppers and onions, Italian Salsa, shredded Fontina, and a dollop of sour cream.

To print a copy of this recipe go to Fajitas Italiano.


Copyright © 2011 by Nicholas Verna. All Rights Reserved. No part of this recipe may be reproduced in any form or by any electronic or mechanical means including information storage and retrieval systems without written permission from the author.

Sunday, September 11, 2011

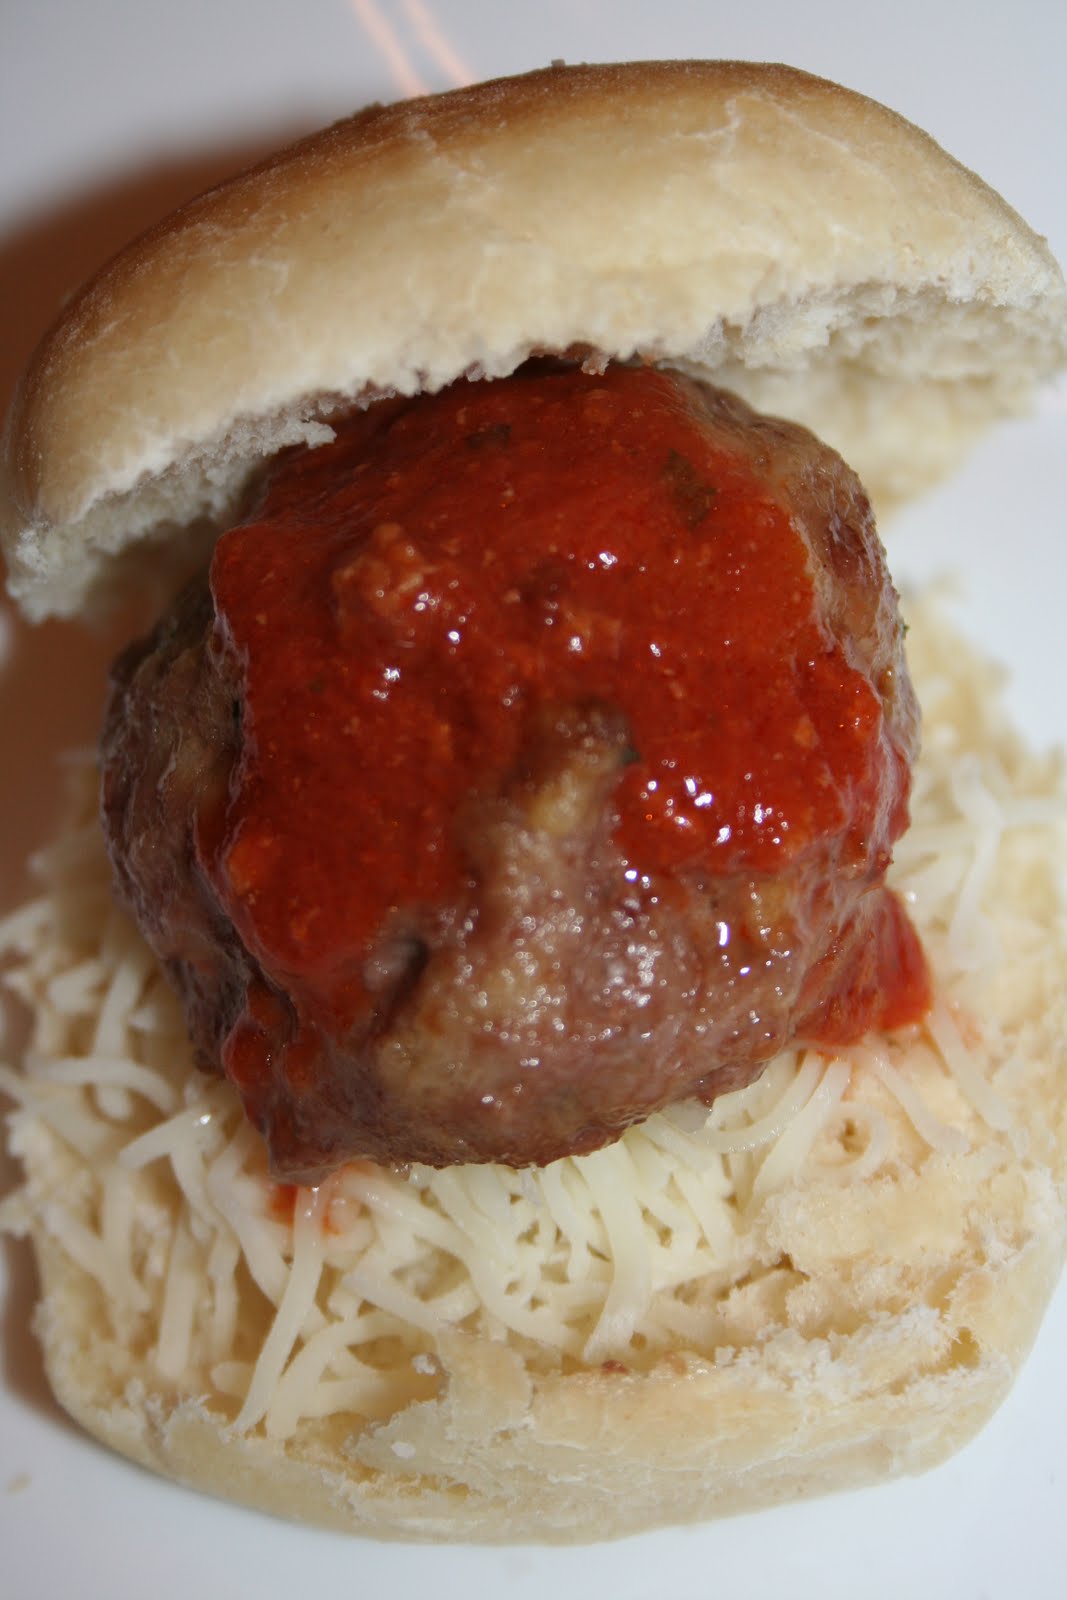
Meatball Sliders


Sliders, also known as “bar burgers”, are not only easier to eat than a full sized burger but they are mysteriously better tasting too. Since 1921 White Castle has been making those tasty little square hamburgers by the millions and they were arguable the first sliders. Many famous chefs now feature sliders on the menu of their new upscale hamburger restaurants – they are even showing up at weddings. Well after 90 years I thought it was time to converge the White Castle hamburger with the Italian meatball sub into an upscale slider that you would be proud to serve to your guests instead of the same old burgers. These sliders are just the right size – you can have more than one and top each one differently. Serve them with a large garden salad, a cold Peroni and you have a meal.

Makes 16 Sliders


Ingredients
4 Slices of White Bread (chopped) *
½ Tsp Garlic Powder
½ Tsp Salt
1 Tsp Dried Parsley
¼ Tsp Ground Black Pepper
2 TBS Grated Italian Cheese
2 Lg. Eggs
2 TBS of water
1 lb. Ground Meatloaf Mix or Ground Round *
16 3 inch buns *

Optional Toppings
1 C of your favorite Tomato Sauce
Shredded Mozzarella
1 tsp Pesto
1/4 C Mayonnaise
 
Preheat the oven to 375°F.
Place the bread into the bowl of a food processor and pulse until it forms small crumbs. Place the breadcrumbs through the water into a large bowl and mix until a paste forms. Add the meat and lightly mix until incorporated.  Do not over mix or your meat balls will become tough.  Use a ¼ inch ice cream scoop to measure out the meatballs. Round out your meat balls by rolling them between your hands and place them on a cooling rack placed inside a jelly roll pan (a cookie sheet with sides). If you measure carefully you will get up to 16 meatballs.

Bake the meatballs for 15-20 minutes or until they reach an internal temperature of 150°F on an instant read thermometer.

Split the buns, add a cooked meatball and your desired topping.

Toppings *
These sliders are great just by themselves but you can enhance the flavor with one of the following toppings:
1 – Marinara Sauce
2 – Shredded Mozzarella
3 – Pesto Mayonnaise (mix ¼ C Mayonnaise with 1 teaspoon pesto)

* Pronto Substitutes

White Bread – Use a good quality white bread such as Arnold Country White.

Ground Meatloaf Mix – Many grocery stores now sell a ground meat mixture that contains beef, pork and either lamb or veal. This really enhances the taste of the meatballs but you can easily substitute ground round.

Slider Buns - Depending on where you shop will determine what kind of three inch soft buns you will be able to find. I used frozen yeast dinner buns that were just the right size. I coated the top with olive oil and then sprinkled on some grated Italian Cheese. I then baked them according to the package directions.

To print this recipe, go to Meatball Sliders

Monday, September 5, 2011

Pork Cutlet and Eggplant Parmigiana


When I was young my mother fried everything, but as I got older she started to bake many things, especially cutlets, to make them healthier. I've kept up that tradition because of the health benefits and because I prefer the taste. They are less greasy and can be equally juicy if you use an instant read food thermometer to make sure that they are not overcooked. These crispy coated pork cutlets, topped with grilled eggplant, smothered in marinara sauce and melted mozzarella were actually inspired by a very bad Italian meal I had on a recent trip to Utah for my daughter’s wedding. The production line meal was greasy and swimming in a tasteless pool of limp tomato sauce. I knew that I could create a much better version of the dish and I think I accomplished it. Please let me know what you think.

Makes 8 servings

8 Boneless Pork Chops*
2 large Eggs
1 tsp Olive Oil
1 tsp Water
2 C Italian Flavored Bread Crumbs
½ C grated Italian Cheese
2 tsp dried Parsley
1 tsp Garlic Powder
1 Lg Eggplant
1 TBS Kosher Salt
3 C Marinara Sauce
2 C Shredded Mozzarella

Trim the fat off of the pork chops and pound them to a ½ inch thickness.  In the first bowl beat the eggs with 1 tsp of water and 1 tsp of Olive Oil. In a second large bowl mix the bread crumbs, cheese, parsley, and garlic powder.

Peel the eggplant and cut into ½ inch slices. Lay the slices out on a paper towel and sprinkle with kosher salt.

Preheat the oven to 375°.

Dip each pork cutlet first in the egg then in the breadcrumbs until coated on both sides.  Place the cutlet on a greased cookie sheet in the oven until an instant read thermometer reads 145°F (~10-15 minutes).  If you prefer, you can fry the cutlets in canola oil until golden brown.

While the cutlets are baking, spray the eggplant with nonstick cooking spray and grill over a medium high heat until they have grill marks.

Remove the cutlets from the oven and place a piece of grilled eggplant on each cutlet. Top each cutlet with marinara sauce and shredded mozzarella.

You can prepare this up to 1 day ahead of time if kept covered in a refrigerator.

Place the cutlets in a preheated oven for 10-15 minutes until the cheese is melted and the marinara in bubbling. Note: if you prepared it the day before it will take at least 30-40 minutes to reheat and have the cheese melt.

* PRONTO SUBSTITUTE
Pork Chops – Substitute thin sliced chicken cutlets or veal cutlets.

To print this recipe go to Pork and Eggplant Parmigiana


Sunday, August 28, 2011

Arugula Salad with Fig, Melon, and Gorgonzola

Inspiration for a new dish can come from many different sources. This salad had two influences. The first was an abundance of figs coming from the tree in my back yard – you can only make so much fig jam. The other flash of inspiration came from an article in an airplane magazine I was reading on my way to my daughter’s wedding in Utah. The result was a salad that my guests raved about and I had to make again the same week we enjoyed it so much. This unbelievable salad tantalizes all 5 senses – sweet melon and fig, sour balsamic, bitter arugula, salt, and savory gorgonzola. While you can substitute any ripe melon for the cantaloupe, I would not switch out any other ingredient in this salad.

Makes 4 serving

4 oz Fresh Figs
2 oz Arugula
1 C Cantaloupe
1 sprig Basil
2 oz Gorgonzola Cheese
¼ tsp Kosher Salt
1 TBS Aged Balsamic
1 TBS Extra Virgin Olive Oil

Trim the stems off of the figs (~1C) then cut them in quarters. Using the small end of a melon baller, scoop out 1 cup of ripe cantaloupe (~1/4 of a melon). Roll up the leaves of the basil into a tight roll and cut diagonally to create thin strips (chiffonade).

Place the washed arugula in the bottom of a salad bowl; add the melon balls, the fig, and the basil chiffonade. Crumble or cut the gorgonzola on to the top of the salad then top with1/4 teaspoon kosher salt and 1 tablespoon each of aged balsamic vinegar and extra virgin olive oil.   For the best presentation, do not toss this salad until you are actually serving it.

Saturday, August 20, 2011

Shrimp & Grits

This dish was inspired by a meal at a local restaurant. I’ve had shrimp & grits many times before and it’s a hit or miss type situation. It’s either so bland that it has no flavor or it’s really good. This recipe is an Italian makeover of this southern classic using creamy polenta, garlic, diced sautéed ham, and tangy balsamic barbecue sauce over a cheesy polenta. Now if you are not familiar with polenta, it’s made from ground yellow cornmeal while grits are made from ground white cornmeal. Their taste is very similar but their texture differs – polenta is more finely ground and smoother than grits. Polenta is sometimes hard to locate and grits can be substituted in a pinch.

Makes 4 main serving or 8 appetizer servings

Ingredients *
2 Cloves Garlic Confit (minced) *
1 TBS Olive Oil
½ lb Deli Ham (have deli give you two ¼” slices)
½ C Catsup
¼ C Balsamic Vinegar
½ C Fig Jam *
1 lb Peeled and Deveined Shrimp 31/40 Count

Polenta Ingredients
4 C Chicken Broth
1 TBS Olive Oil
½ C Grated Romano or Parmesan Cheese
1 C Instant Polenta *

Mince the garlic and dice the ham (1/4” cubes). Heat the olive oil in a sauce pan over medium heat and sauté the garlic for 30 seconds. Add the diced ham and sauté for and additional 3-4 minutes, stirring frequently. Add the catsup, balsamic vinegar, fig jam and bring to a low boil. Lower the heat to a low simmer and cook for 10 minutes. Note: this can be made up the day before and refrigerated until needed.

While the barbecue sauce is cooking, prepare the polenta. In a medium saucepan add the chicken broth, olive oil, and grated cheese and bring to a boil for 2 minutes. Remove from the heat and add the polenta, beating with a whisk until smooth. Return to the flame and continue to cook over medium heat for 5 minutes, whisking continuously. Remove from the heat and cover while you cook the shrimp.

Add the peeled and deveined shrimp to the simmering barbecue sauce and cook until the shrimp turns pink.

Divide the polenta into 4 wide soup plates. Top each dish with the shrimp and barbecue sauce. Serve immediately.

* Pronto Substitutes

Garlic Confit –Substitute 1 clove finely minced garlic.
Fig Jam – Substitute apricot jam for the fig
BBQ Sauce – If you don’t want to make your own barbecue sauce, sauté the garlic in the olive oil and substitute 1 cup of your favorite BBQ sauce for the catsup, balsamic vinegar, and jam.
Polenta – Substitute instant grits for the polenta in this recipe.

To print a copy of this recipe go to Shrimp & Grits.

Sunday, August 7, 2011

BlueBarb Jam

Makes 6 pints BlueBarb jam
           
12 8oz. (½ Pt.) canning jars and lids
2 - 8 Qt Pots

4 C Rhubarb (finely cut)
4 C Crushed Blueberries (~3 Pints)
8 C Sugar
2 boxes Fruit Pectin

I have to admit that my family is spoiled. They only want to eat homemade jam, and I don’t blame them. A few years ago my next door neighbor was telling me that she could no longer find bluebarb jam. This sent me on a quest to make the perfect blueberry and rhubarb jam that was sweet but still had a tang. I remember growing up with my mother making rhubarb compote every summer and I wanted to add that flavor to this jam.  I hope you enjoy it.

Wash the blueberries and rhubarb and prepare the jars for canning.  This is an important step since food spoilage occurs easily if the canning is not done properly.  I suggest you go to your favorite source to find out what the best practices are for canning, such as www.homecanning.com. Follow the directions for high-acid foods exactly. 

Dice the rhubarb into ¼ inch pieces and set aside in a large bowl. Mash the blueberries until you have four cups worth.  Combine the rhubarb and the blueberries in an 8 qt pot, add the sugar and thoroughly mix.  Place over high heat; bring to a full rolling boil, stirring constantly. Boil for EXACTLY 1 MINUTE and then remove it from the stove. Watch out — it will splatter.  Add the two boxes of pectin, stirring until it’s dissolved.  Place your immersion blender into the jam and process until no lumps are visible.  Keep the head of the immersion blender in the jam.  If it is spinning and you lift it above the surface of the jam you will splatter very hot jam everywhere. If you do not have an immersion blender you can put it in your food processor in batches.  Be very careful – it’s hot!

Using a sterile canning technique, fill the jars with the BlueBarb Jam leaving a ½ inch clearance between the top of the jam and the lid.  Cap the jars immediately with new lids.  The lid rings can be reused as long as they are clean and sterilized.  Let the jars cool for several hours until you will hear the lids pop.  This signifies that a jar is sealed properly.  After all of the jars have cooled completely, press the tops of the jars to make sure they are sealed.  If the top "pops" down then refrigerate this jar for immediate consumption. I suggest you go to your favorite source to find out what the best practices are for canning, such as www.homecanning.com. Follow the directions for high-acid foods exactly.

The BlueBarb jam will keep in your refrigerator for up to three weeks after opening.  If you don't plan on using it quickly I recommend that you use the small 4 oz. jars so that they are open the least amount of time.

I do not have the luxury of having a blueberry farm near me so I will usually wait until the blueberries in the grocery store go on sale before I make BlueBarb jam.  You can use frozen blueberries but the fresh are better.  Now if the rhubarb is not available at the same time as the blueberries I have frozen the blueberries until I'm ready to use them. 

Rhubarb is available in the produce section of you grocery store but I have always grown it in my garden.  It is a perennial and comes back year after year.  It looks great too with its red stalks.

* PRONTO SUBSTITUTE

Fresh vs. Frozen – If fresh blueberries or rhubarb are not available you can use frozen blueberries or rhubarb.

To print a copy of this recipe go to BlueBarb Jam.